new Sienta install sequential turn signal
Index
・I want to attach a sequential blinker by all means ...
・The difficulty level increases as you try to attach it under the light (^ _ ^;)
・Finally it arrived. Shared style sequential LED tape.
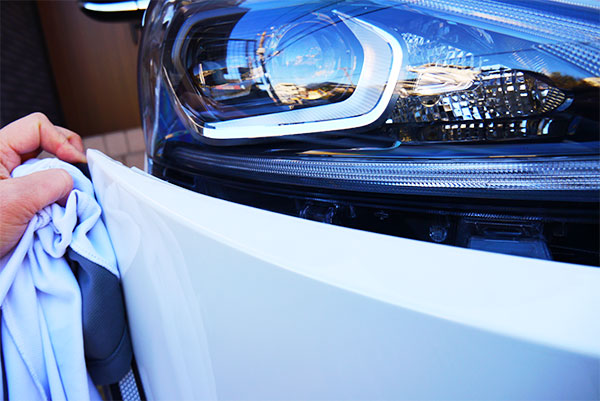
・First prepare to shift the front bumper
・Shift the front bumper at last
・Stick the LED tape under the headlight
・Finally the operation of the sequential turn signal!
・It was pretty difficult, but unexpectedly it did not take long
Installation time: 3 hours
What I bought this time: 6,358 yen
Difficulty: High
I want to attach a sequential blinker by all means ...
I am on the new Sienta HYBRID G White Pearl.
Sequential turn signal (flowing turn signal) starting from Audi!
Even after CH - R 's sequential turn signal came out, I thought it was much better.
And a sequential turn signal also to the new alphard and velfire!
I already have the feeling I want to put (^ ◇ ^;)
For sequential turn signals, I think there are pros and cons,
I like that digital feeling, I love the way the LED shines to move (¯ ∀ ¯)
The difficulty level increases as you try to attach it under the light (^ _ ^;)
I feel that there are many people who are attaching sequential turn signal to Siienta,
but even if I am surprisingly watching the net, it feels less.
Even though it is attached, it seems that there are many cases that
LED tape is attached to the upper side of the headlight.
Since the upper side of the headlight originally has a gap with the hood, it seems easy to install.
But, as for me, I'd like to finish even a little "genuine" ...
I really want to put it on the underside of the headlight.
When attaching under the headlight, it is still inevitable to remove the front bumper · · ·
I think that the load seems to be heavy to me (~ _ ~;) but I thought once again to check,
I looked at the part of the front bumper removal many times.
Sienta Hybrid (NHP 170 G) Maintenance All-in-one DVD interior & exterior set
... While I was watching about 5 times, I thought "Is that so, can I even remove my front bumper myself?" (^ _ ^;)
There is no other choice but to push forward.
With amazon and Rakuten, I examine various LED tapes for sequential turn signal,
I decided to buy this item of "share style"!

【Scheduled arrival from mid February to late February 2】 Patent pending Genuine Sequential LED Tape Silicon type [White / Amber] [Light Blue / Amber] 60 cm 2 pcs 1 set [J]
You can watch videos of how to attach to CH - R and VelFire etc on YouTube. Although it is a method of mounting on the headlight,
It will be a good reference.
It is nice to have decided to buy, but it seems that it is quite popular and is in short supply. It is not quite "in stock" · · · (· _ ·;
When I was watching Rakuten as a chokkoko, there was a timing that it was in stock, or it was in stock, but it was in a condition to be put in cart,
I immediately reserved (I was out of stock shortly afterwards.) After all I waited for about a month until goods arrived after all. · · · (^ _ ^;)
Finally it arrived. Shared style sequential LED tape.
I did not expect to be kept waiting for one month from reservation until the item arrives (^ _ ^;)
But I managed to make it by the end of the year holiday, so I can attach it carefully!
↓ It is such a light content with such feeling. Since thin LED tapes of 3 mm thickness are on sale, the product is light and obvious, but waiting too much,
Only expectation is inflating ...
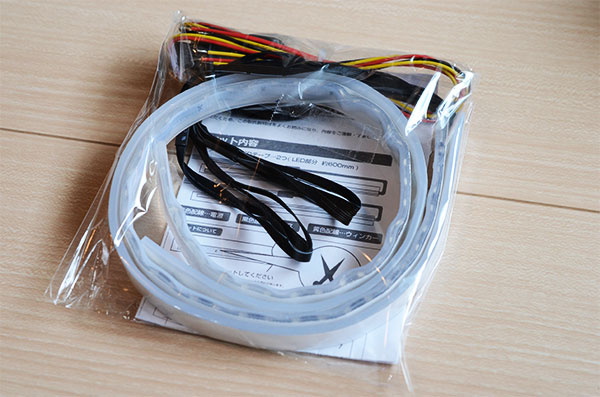
↓ It contains two LED tapes on the left and right. Beyond each tape, there is a longer code,
Beyond that, a small box with a foundation for moving the flowing blinkers is attached.

↓ I will take a closer look at the essential LED tape. You can cut with scissors so that you can adjust the length.
To be able to cut and adjust, it is an essential condition to install cleanly.
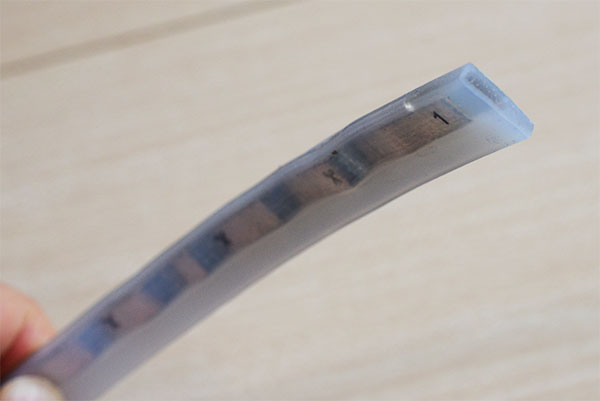
↓ Install this side so that the front side can be seen on the surface. There are LEDs and wiring on the silver part on the back side.
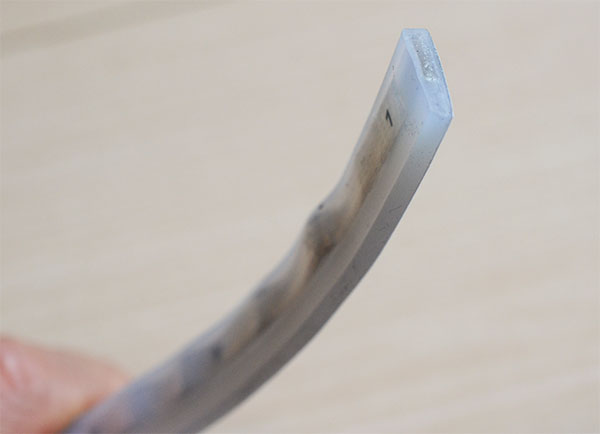
↓ The back side comes with double sided tape. The adhesion was ... so far. If it is a sharp curved surface, is it difficult to install with this double-sided tape alone?
I think that.

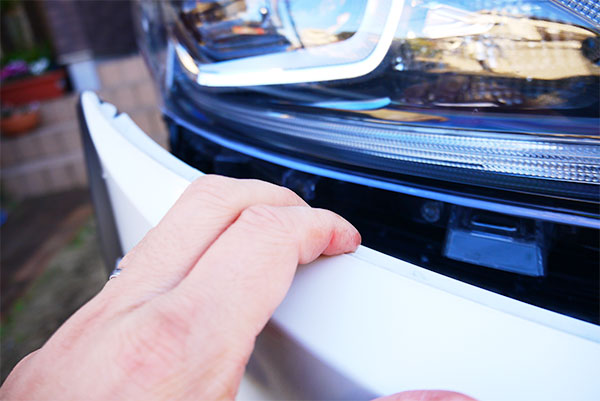
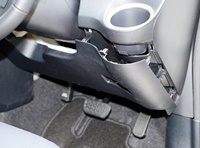
First prepare to shift the front bumper
Since it is absolutely necessary to attach the LED tape to the bottom side of the headlight, it is necessary to remove the front bumper.
Sienta Hybrid (NHP 170 G) Maintenance All-in-one DVD interior & exterior set
Check it over and over again,
"You only have to shift parts of the headlight without having to remove the front bumper."
I decided to work in a way called.
Since I basically work alone, if I remove the front bumper completely, I will install this bigger one again,
I think that it is quite hard work. However, if you do not remove the bolt at the center of the lower side of the bumper, the bumper itself will not come off,
You can leave space under the light! It is the calculation of (¯ ー ¯)
By saying ↓, first remove 5 clips on the front bumper as shown in this picture.
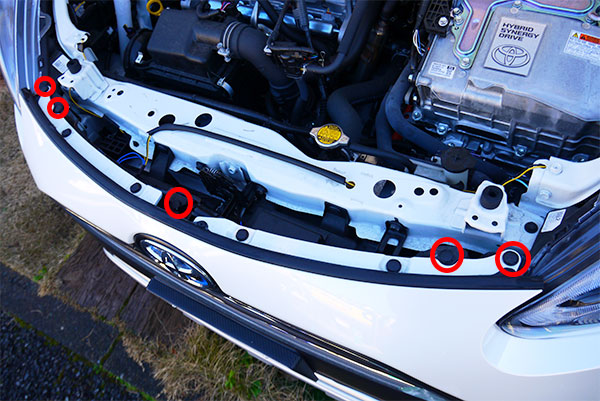
↓ If you use a flathead screwdriver to push up the middle patch, you can easily remove this clip with your hand.
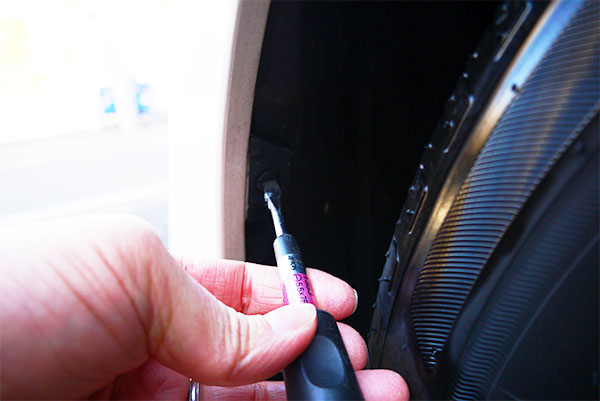
↓ Next, next to the front tire house, turn the minus screw (plastic) 90 degrees and then pull it out.
This picture is a state where the left front tire house is looking towards the direction of travel.
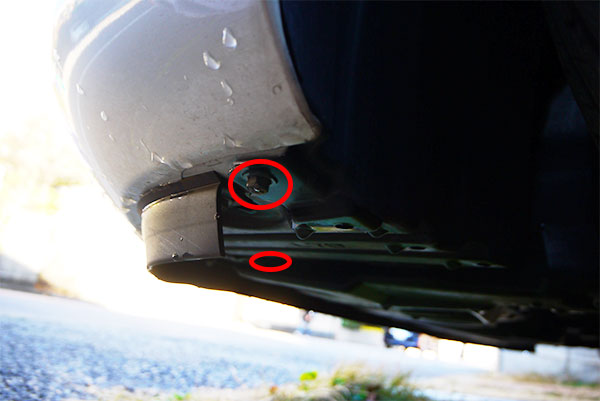
↓ We also removed two bolts on the left and right sides of the front bumper. If you remove the bolt here only,
This is why it is easy to shift the front bumper.
I can not see it well in the picture, but it is the bolt around where the red circle is removed.
Both were wood screws. It can be removed with a 10 mm socket wrench. It was pretty loosely tightened. Because it is a wood screw it is so loose ...
When returning, you need to be careful not to overtighten.
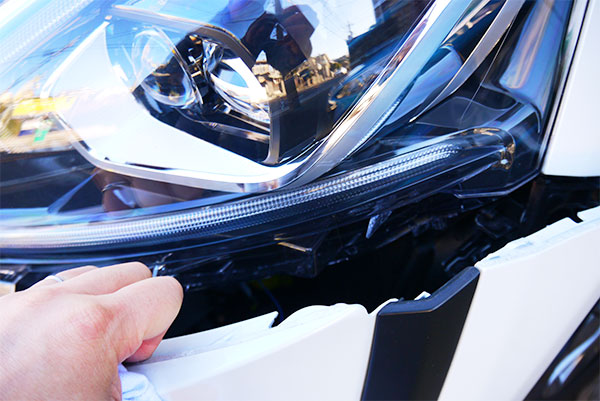
Shift the front bumper at last
I checked it many times on DVD, so I should be able to remove it properly! Actually slide the front bumper.
↓ I will remove it from the right side. It is a procedure to remove from the side of the tire house.
↓ Remove the end of the front bumper that is stuck with the claws on the side of the tire house.
This was unexpectedly stuck in and it was hard to get out. It hurts a bit with bare hands, is not it? (· _ ·;
It seems to be good to work with gloves. Since I had no gloves at hand, I relaxed the pain of my hands with a T - shirt that I do not need.
I feel like I will pull it towards you slightly and remove it like spreading outward.
When the claws come off, I pull it tightly and outwardly to the outside until it sounds "bangy". I have to check firmly on DVD,
It is a frightening and unlikely trick (^ ◇ ^;)

↓ I left it the same way (struggling).
↓ If we can do so far, if we pull the middle of the front bumper towards you, the whole was deviated obediently and shifted forward. I'm impressed (T ^ T)
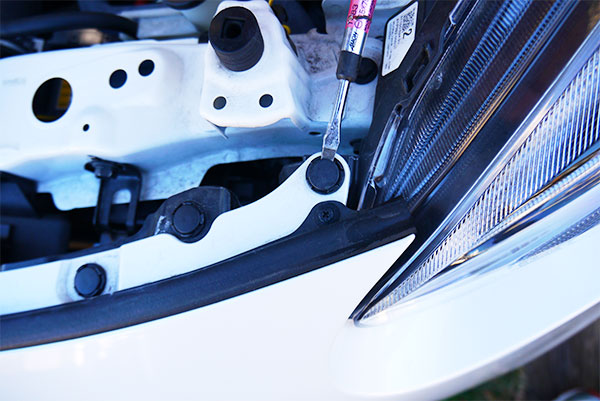
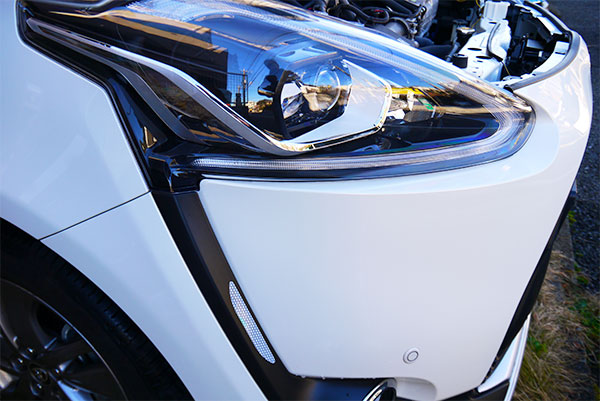
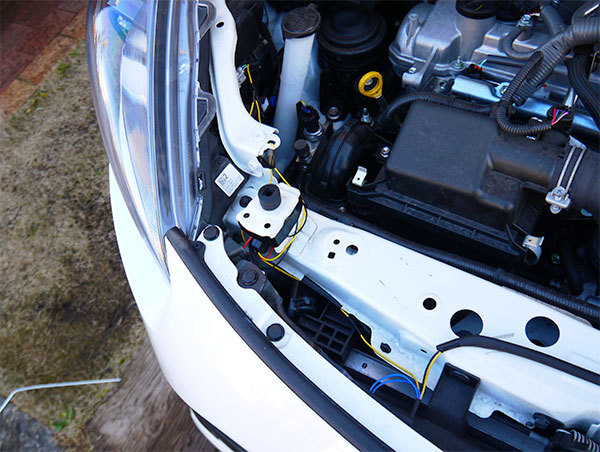
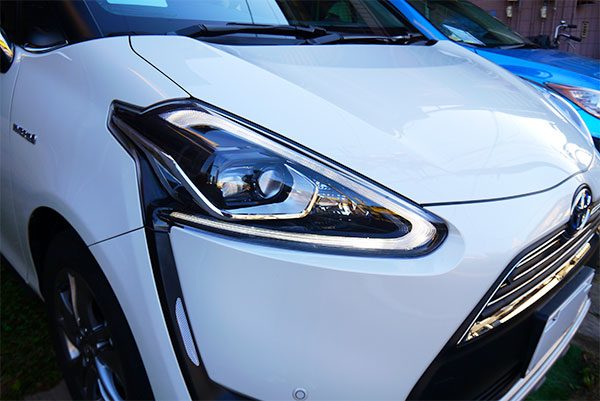
↓ As long as the gap between the headlight and the front bumper is empty, it seems that you can affix the LED tape!
↓ Looking from the front side like this. I think that it is difficult to understand what is going on under the headlight,
Under the headlight is totally transparent, so it was hard to understand what was going on with the naked eye (· _ ·;
↓ The center side of the light is like this. There seems space to paste LED tape.

↓ This is left light. I'm going to work from now on for my recordings? For those of you who posted more pictures.
↓ It is the center side of the light on the left side. If you remove the front bumper completely, you can take more clear photos ... (^ _ ^;)
I really wanted to take a picture I looked up from the bottom.

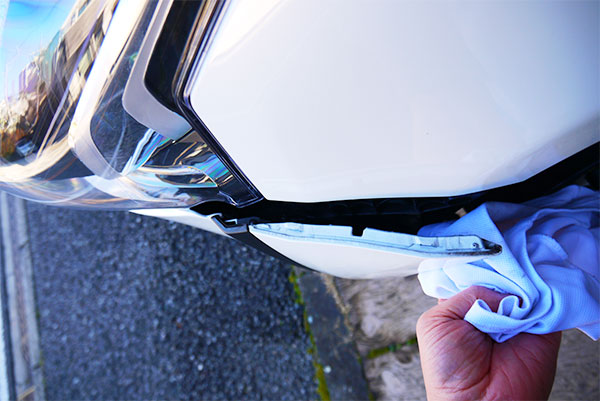
Stick the LED tape under the headlight
↓ We first lightly applied the LED tape under the headlight, checked the length and cut the LED tape. I cut off four frames.

↓ I bought it earlier
Cemedine JIS silicone sealant 8060 Pro 330 ml clear (translucent)
I buried the cut part. With rain it is safe now (^ _ ^)

↓ The center side of the light goes down slightly from the bottom line. As for me, is it the point that it is cool here? ! I think.
From the straight line, it is cool that the LED goes down slightly from the top down to the eyes. It is such an image.
↓ There is wiring on the source side where the LED flows. This wiring was easy for Sienta to take over, it was convenient.
↓ I pasted the LED tape under the headlight. In this picture I do not know the positional relationship before and after ... · (^ _ ^;)
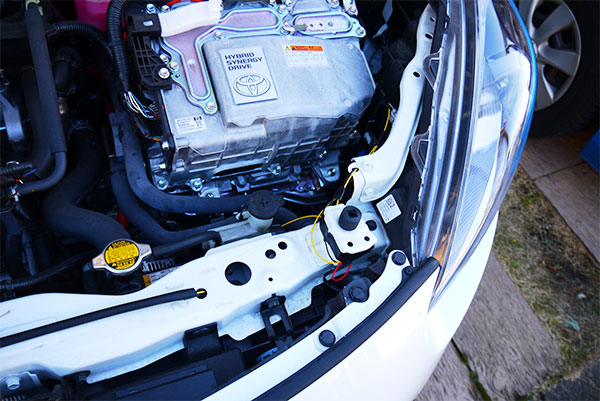
↓ I took the right headlight from the side. The part of the red arrow is the end of the LED tape.
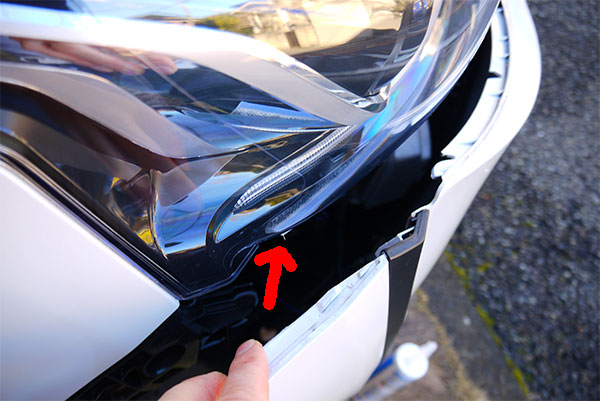
↓ I took the right headlight from the side slightly from the bottom. I have attached LED tapes like this.
I needed to adjust the fine position later, but I put it roughly in this position.
↓ The white line seen under the headlight is the side of the LED tape. It's gonna be here.

↓ Redo many times so that the position of the LED tape and the position where the front bumper and the head light make contact perfectly ...
The position was decided like it somehow!
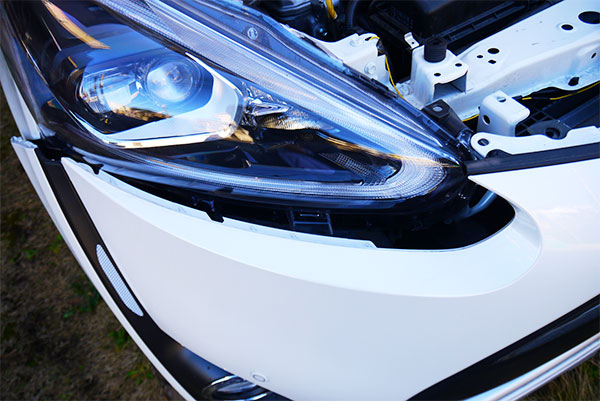
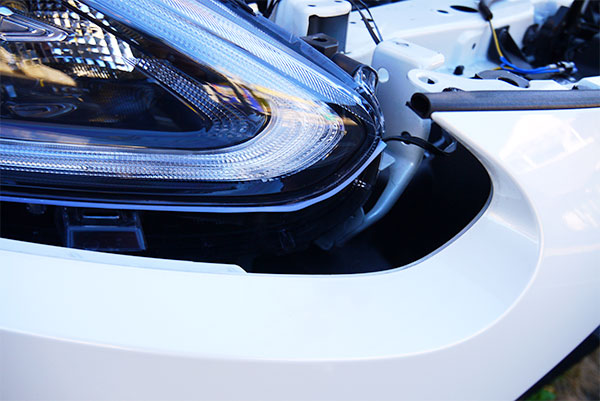
↓ After mounting the LED tape, the front bumper was returned to its original position.
Looking at it, you can see that there is an LED tape under the light, but I do not know until it is told (^ _ ^)
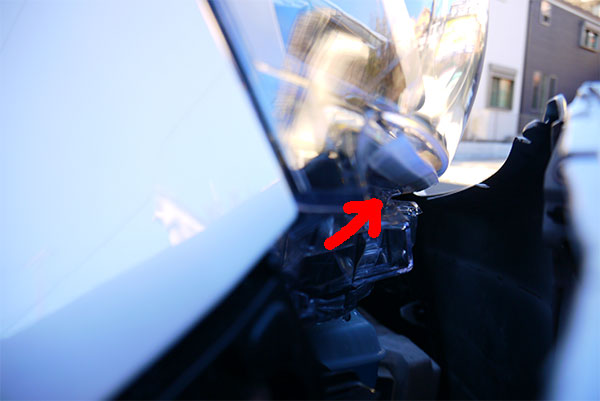
↓ Looking from the side, I will check whether the LED tape is between the headlight and the front bumper.
Although the thickness of the LED tape is 3 mm, it seems that there is some flexibility as it is a material like silicon,
Without such a sense of incongruity (my subjective, but ...) I could install the front bumper as it was.
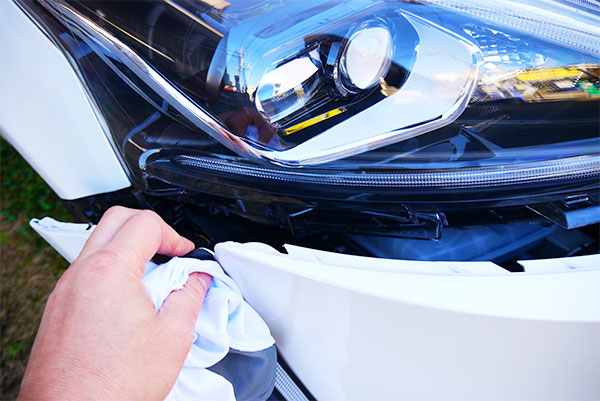
↓ On the left side too, I adjusted the position of the LED tape many times and it was able to fit in a position that looks like it somehow! (^ - ^)
↓ The installation of the front bumper on the left side seems to be OK.
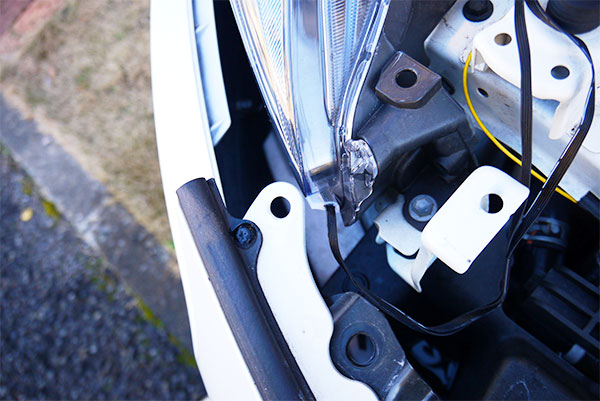
The rest is wiring of LED tape. Winker wiring,
When turning the front turn signal LED
Since it is pulled out, it is connected there (there are wiring for daylight, but I decided not to wire yet this time).
Earth is connected to the body, excess wiring and small boxes,
I pushed it into the protrusion shown in the center of the photo and pressed it with vinyl tape. I felt just right (¯ ー ¯)
↓ Push the wiring etc in the same way on the left side under the protrusion visible in the center of the picture, and lid with vinyl tape. It seems that it will not move strangely with this.
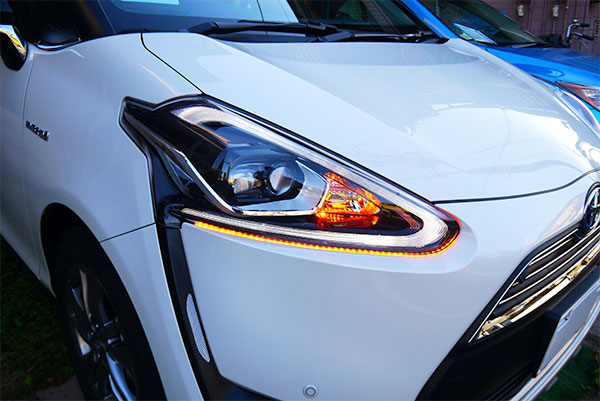
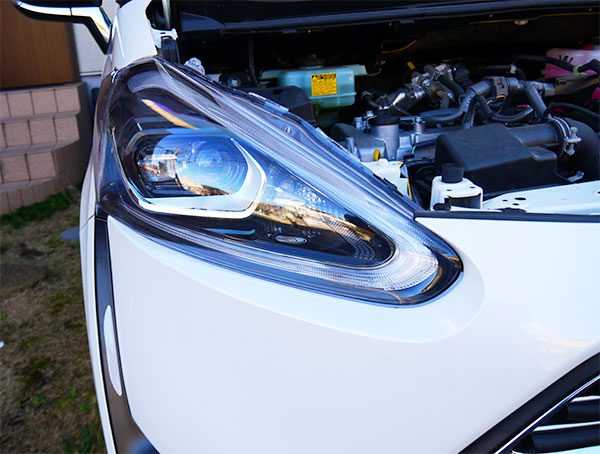
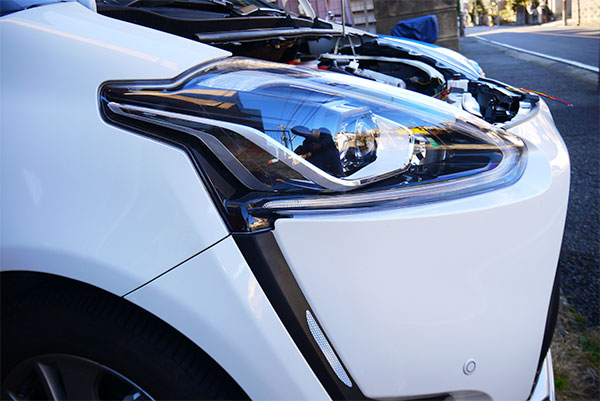
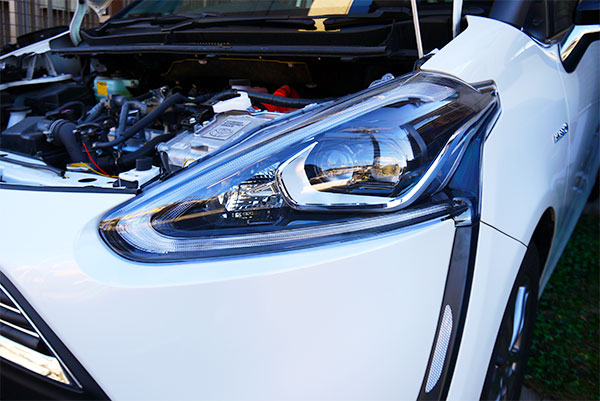
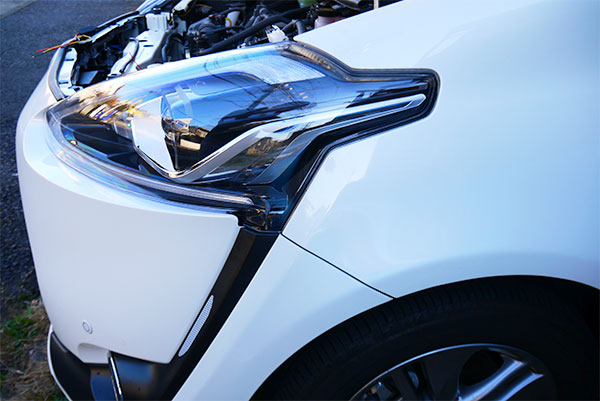
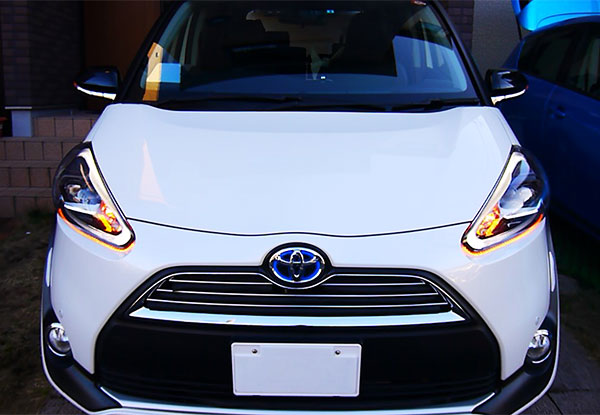
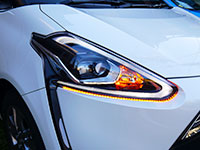
Finally the operation of the sequential turn signal!
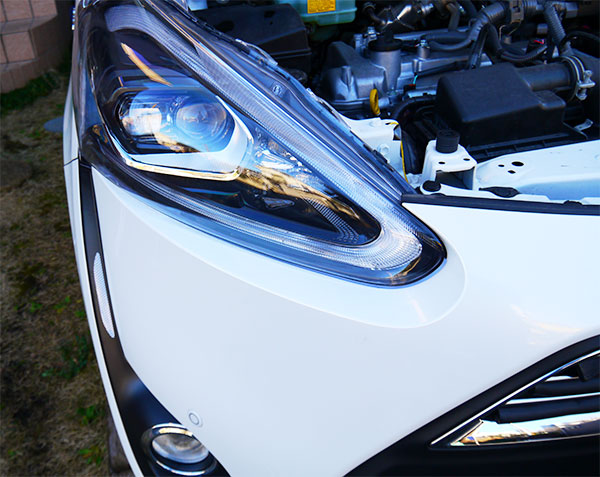
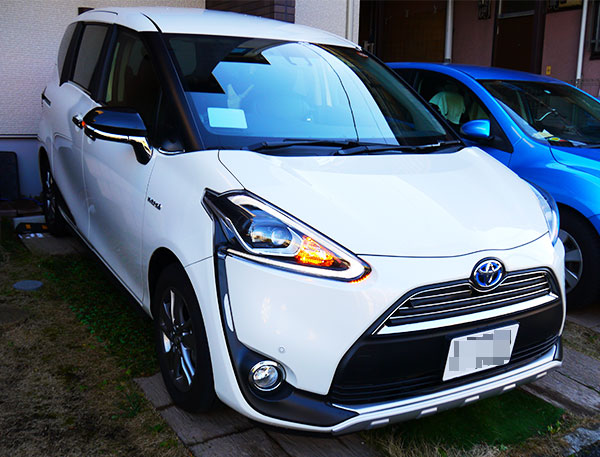
Sienta after installing sequential turn signal. When I pull this picture and take a picture, I do not understand the difference at all.

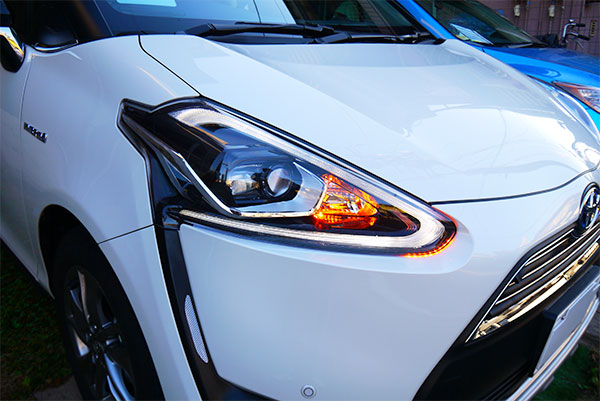
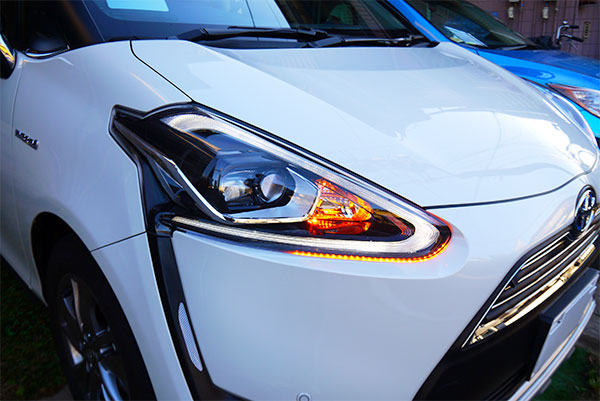
↓ After checking with a hazard ... LED light from the center side! (* ^ ▽ ^ *)
↓ And the LED light will flow behind properly!
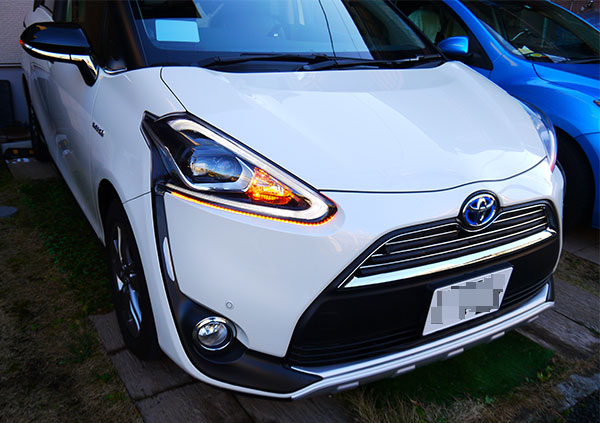
↓ Looking from the front, this is the feeling. Although it is in a state not exposed to direct sunlight, it is quite brightly shining.

↓ The movements and crispness of this LED are good, I feel good just by looking.
↓ Finally put 4 sequential photos of sequential turn signal.

↓ This is a video. In fact, it looks a bit more pretty (¯ ▽ ¯)
It was pretty difficult, but unexpectedly it did not take long
From a state where you do not know whether it can be installed properly, please shift the front bumper and attach the LED tape ...
After all it was incredible! I was working while thinking what to do if I became, but I managed somehow!
I am surprised by the good quality at all than I imagined (self evaluation, ^ _ ^;)).
I started working around 12 o'clock in the day and finished around 3 o'clock. I felt I was working for a long time,
It was unexpectedly not taking time. I made preparations for DVD beforehand. Winker wiring,
I knew it was done once at the turning point of the blinker, so I worked smoothly.
Whether or not you like sequential turn signal, or a little to add sequential turn signal ...
I think that there are surely more people, but I personally recommend it very much! (* ^ ▽ ^ *)
Whether positioning of the LED tape is well decided may be a difficult point (^ _ ^;)
 65
65
ページトップへ戻る

new Sienta change fog lamp to day light
2018/01/07 -
-
new Sienta install sequential turn signal
2017/12/30(8)

new Sienta install drive recorder DRY-WiFiV3
2017/11/07-

new Sienta install cruise controll pivot 3DA-C part1 speed signal
2016/07/17-
new Sienta install cruise controll pivot 3DA-C part2 accelerator pedal
2016/07/17-

new Sienta install cruise controll pivot 3-drive・α
2016/07/16-
info@aray.jp